手把手教学经典圣杯3列布局
时间:2024/4/22作者:未知来源:争怎路由网人气:7
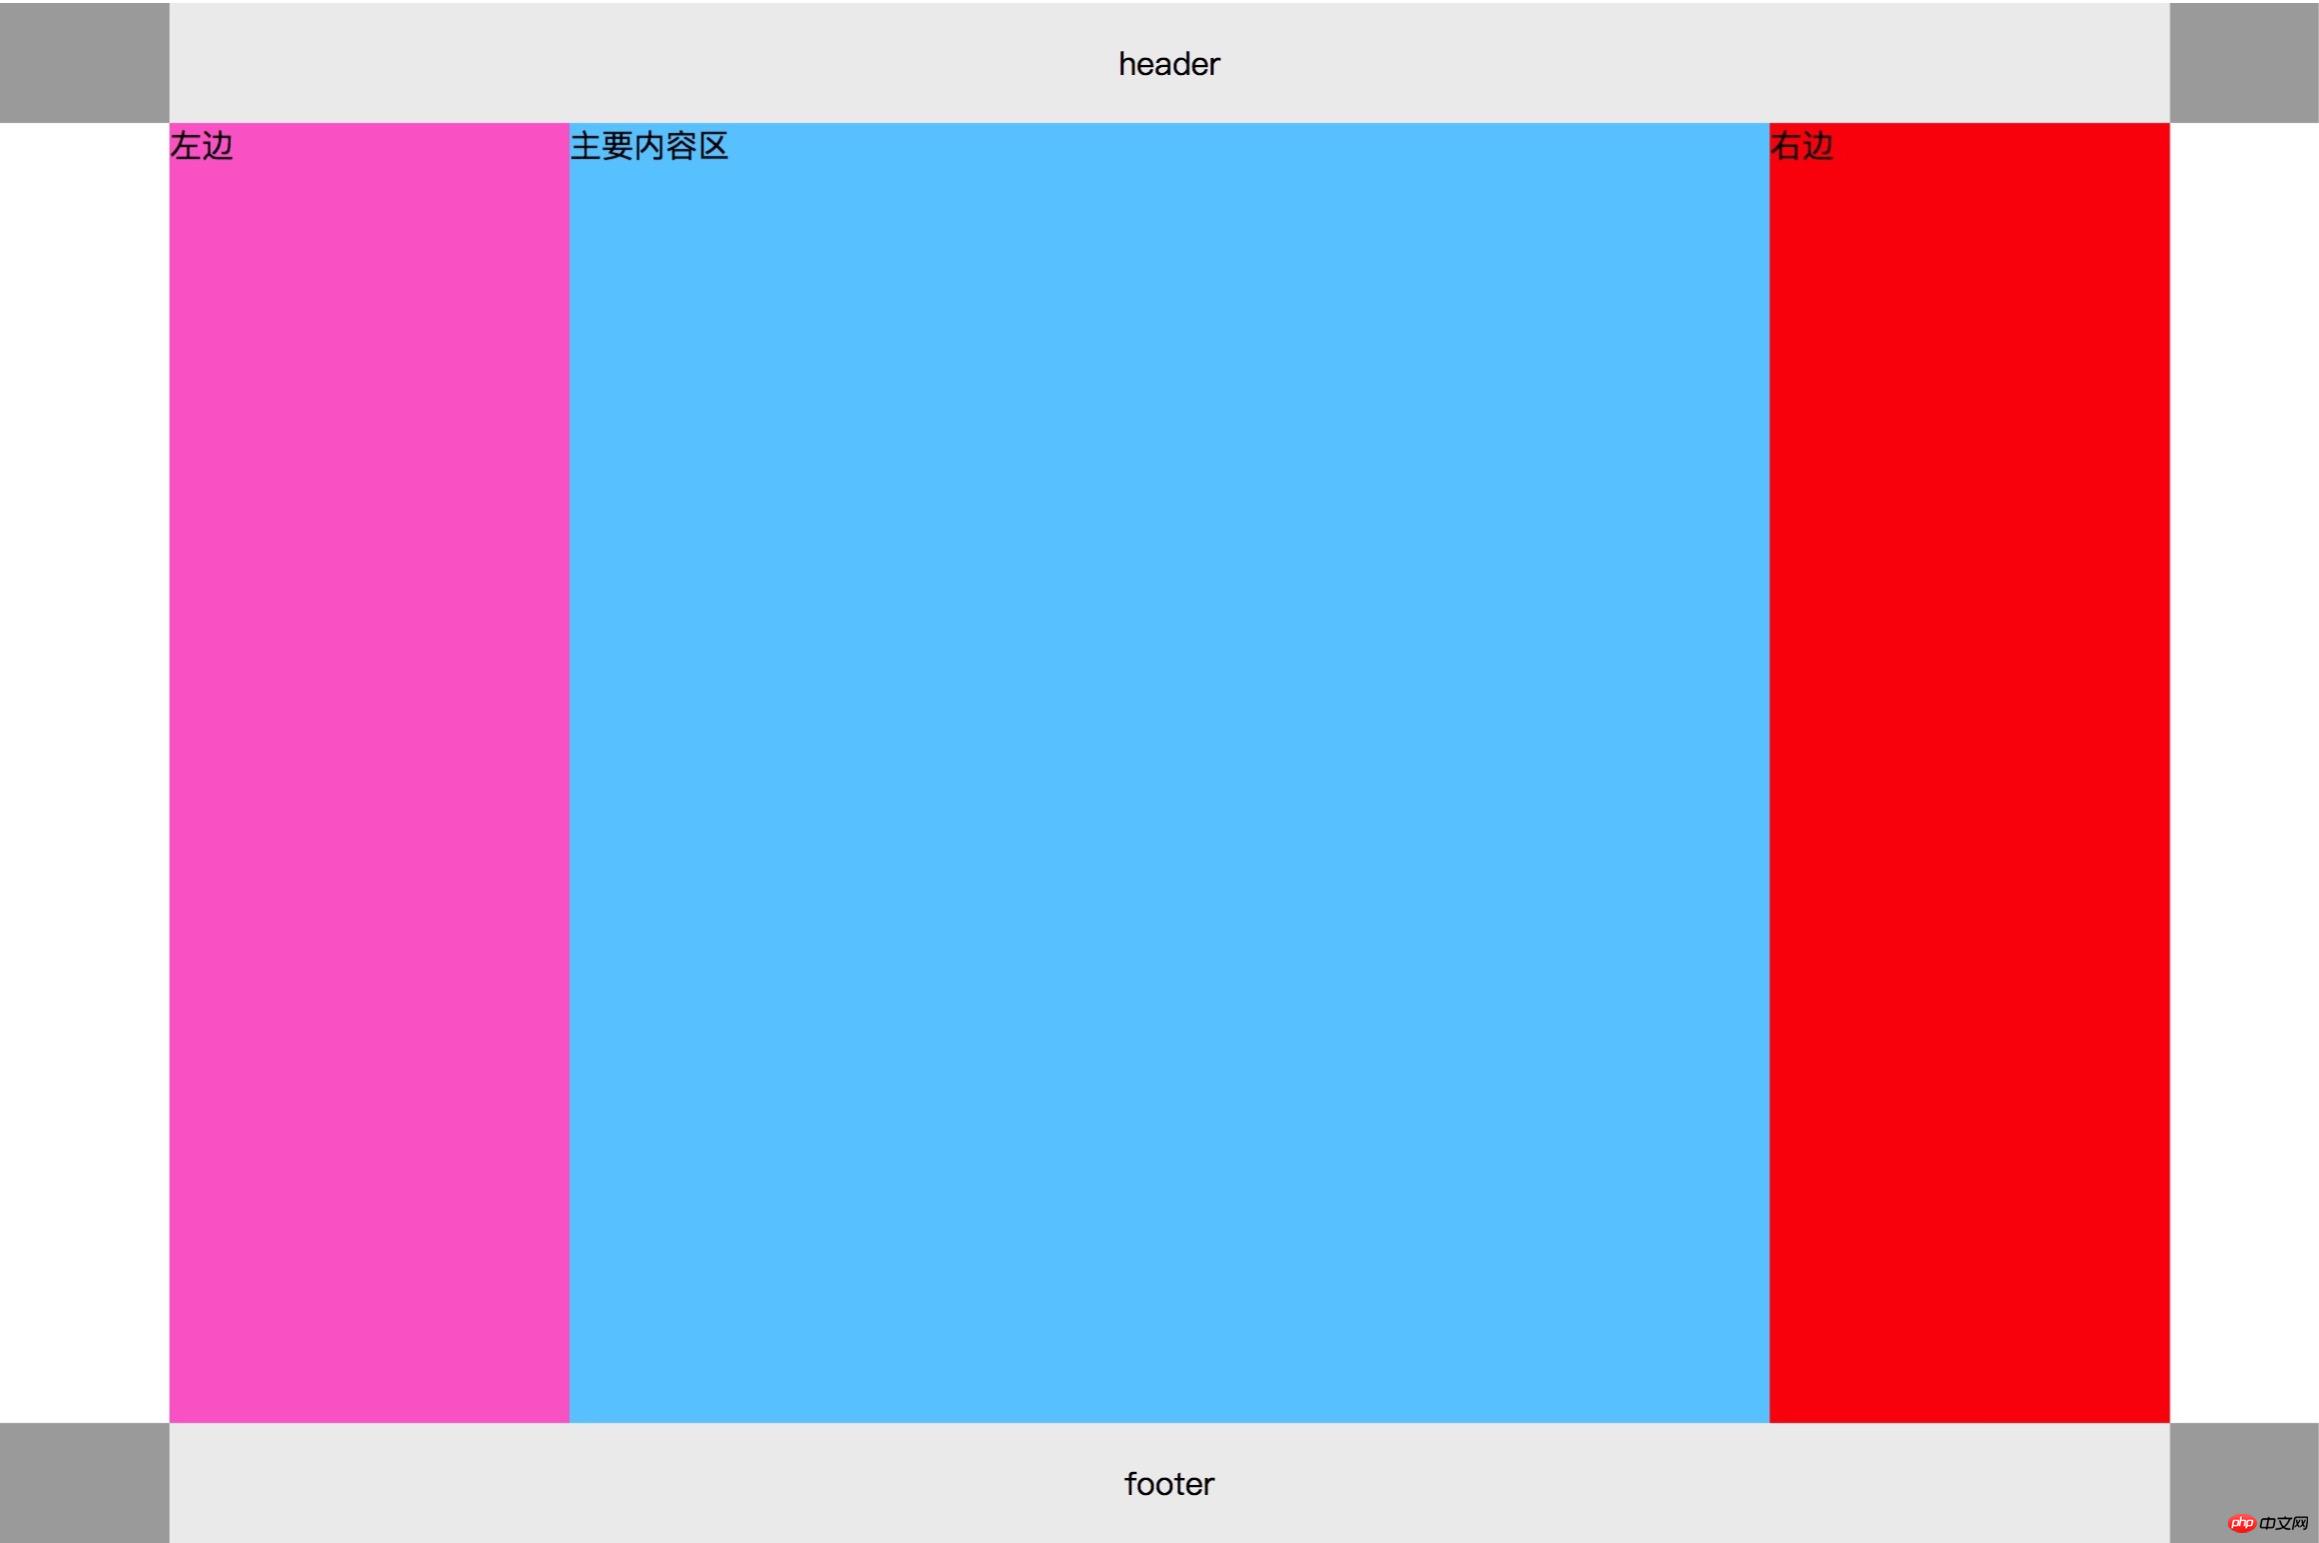
- 网页的本质就是超级文本标记语言,通过结合使用其他的Web技术(如:脚本语言、公共网关接口、组件等),可以创造出功能强大的网页。因而,超级文本标记语言是万维网(Web)编程的基础,也就是说万维网是建立在超文本基础之上的。超级文本标记语言之所以称为超文本标记语言,是因为文本中包含了所谓“超级链接”点。相对于"双飞冀布局",圣杯布局的DOM结构更简单,更优雅,最终效果图:

下面是圣杯布局的核心代码:
<!DOCTYPE html>
<html lang="en">
<head>
    <meta charset="UTF-8">
    <title>圣杯</title>
    <style>
 .header, .footer {
            width: 100%;
 height: 60px;
 background-color: #aaa;
 }
        .content {
            width: 1000px;
 min-height: 100%;
 margin: auto;
 text-align: center;
 line-height: 60px;
 background-color: #eee;
 }

        .container {
            width: 600px;
 margin: auto;
 overflow: hidden;
 padding: 0 200px;
 background-color: yellow;
 }

        .main {
            width: 100%;
 min-height: 650px;
 background-color: #66CCFF;
 float:left;
 }

        .left {
            width: 200px;
 min-height: 650px;
 background-color: #FD6FCF;
 float:left;
 margin-left: -100%;
 position: relative;
 left: -200px;
 }

        .right {
            width: 200px;
 min-height: 650px;
 background-color: #FC0107;
 float:left;
 margin-left: -200px;
 position: relative;
 right: -200px;
 }
    </style>
</head>
<body>
<div class="header">
    <div class="content">header</div>
</div>

<div class="container">
    <div class="main">主要内容区</div>
    <div class="left">左边</div>
    <div class="right">右边</div>
</div>

<div class="footer">
    <div class="content">footer</div>
</div>
</body>
下面我将代码中的内容逐条解释给大家:
第一步: 创建DOM结构:
基本原则是:
1.头 + 中 + 底 三部分,其中中部区域是页面主体,用三列布局完成;
2.中间三列中,中间为显示主体,必须放在前面,优先渲染,提升用户体验;<!--1.头部:--> <div class="header"> <div class="content">header</div> </div> <!--2.中间主体:--> <div class="container"> <div class="main">主要内容区</div> <div class="left">左边</div> <div class="right">右边</div> </div> <!--3.底部:--> <div class="footer"> <div class="content">footer</div> </div>
第二步: 将页面头部和尾部公共样式写出来[写在当前文档<style>标签中]:
.header, .footer { width: 100%; height: 60px; background-color: #aaa; } .content { width: 1000px; min-height: 100%; margin: auto; text-align: center; line-height: 60px; background-color: #eee; }
详解:
1.先设置头部与底部的共同样式:
(1)width:100%; 宽度与页面等宽为: 100%,将会自动延展;
(2)height:60px; 高度暂设为60像素,不够还可以再调整;
(3)background-color: #aaa; 设置背景参考色,可以根据需要决定是否保留;
2.设置头部与底部内容区的样式:
(1)width:1000px; 将公共内容区变化较小,设置为固定宽度,便于内容填充;
(2)min-height:100%; 设置最小高度以保证页面布局完整,自动使用父级度高60px;
(3)margin: auto; 公共内容区content也是一个块,将它在父级容器中居中,要使用margin;
(4)text-align:center; 内部文本水平居中;
(5)line-height: 60%; 内部单行文本垂直居中;
(6)background-color:#eee; 设置背景参考色,根据情况确定是否保留;第三步: 设置中间主体容器的样式:
.container { width: 600px; margin: auto; overflow: hidden; padding: 0 200px; background-color: yellow; }
详解:
1.width: 600px;
设置三列布局的父容器总宽度600px,为什么是600像素,因为我的页面总宽度为1000px,左右二侧宽度为200px,
所以中间部分为600px,这里将容器总宽度设置为600px有二个作用:1,是给中间区块继承用,二是可以通过padding来扩展,
所以不必担心600px,包不住三列内容;
2.margin: auto; 将父容器在当前窗口中居中显示;
3.overflow: hidden; 因为后面的三列内容我要用到浮动,为了让父容器包住子块,不会出现高度塌陷,这里要设置溢出隐藏;
4.padding: 0 200px;
该语句有二个作用:
(1)设置内边距padding,可以让当前容器左右二边的宽度各扩大200px,即400px,此时容器总宽度为1000px;
(2)容器宽度扩展后的空间,实际上就是给后面的左右二列侧边栏预留的空间,否则左右二栏显示不出来;
5.background-color: yellow; 设置背景参考色,用来查看当前三列布局情况,最终会被删除或改变;第四步: 设置三列中的中间内容区
.main { width: 100%; min-height: 650px; background-color: #6CF; float:left; }
详解:
1.width: 100%; 中间宽度为100%,实际上就是600px,占据当前容器全部内容区空间(不包括padding的400px);
2.min-height: 650px; 设置一个最小高度,当内容不多时,仍能显示出足够的高度,不影响页面的整体美观与用户体验;
3.background-color: #6cf; 设置参考背景色,根据需要决定最终是否保留;
4.float: left; 至关重要,将中间区块浮动起来,脱离文档流,并占据全部内容区,此时左右区块会自动补位上移;第五步: 设置左列的显示样式
.left { width: 200px; min-height: 650px; background-color: #FD6FCF; float:left; margin-left: -100%; position: relative; left: -200px; }
详解:
1.width: 200px; 左列宽度为200px,与容器中预留的padding宽度相同;
2.min-height: 650px; 宽度与中间列保持一致,当然你也可以不一致;
3.background-color: #fd6fcf; 背景参考色,根据情况决定最终是否保留;
4.float: left; 很重要,浮动起来脱离文档流,因中间块宽度为100%,所以会被挤压到下面;
5.margin-left: -100%; 将左列通过设置负外边距方式移动到父容器预留的左侧padding中;
注意-100%,等价于: -600px,因为目前父容器.container宽度就是600,设置负值,就是向反方向拉元素
但此时,左列会占据了中间内容区的左边的200px位置;
6.position: relative; 设置左列的元素定位方式为:相对定位,相对于原来的位置,仍在文档流中.
7.left: -200px; 负值是向左移动,,将左列移动到容器container的padding-left区内,注意,
如果没有设置容器container的padding,你会看不到左列的.第六步: 设置右列的显示样式
.right { width: 200px; min-height: 650px; background-color: #FC0107; float:left; margin-left: -200px; position: relative; right: -200px; }
1.right: 200px; 宽度与左列相同,均为200px;
2.min-height: 650px; 最小高度与左列一致;
3.background-color: #fc0107; 设置参考背景色;
4.float: left; 设置左浮动,脱离文档流后,对它重新进行排列;
5.margin-left: -200px; 向反方向上移200px,其实就是与中间列并排显示;
6.position: relative; 设置相对定位
7.right: -200px; 将右列移动到容器的padding-right区域内
到此为止,圣杯布局完成~~
聪明的你,学会了吗?以上就是手把手教学经典圣杯三列布局的详细内容,更多请关注php中文网其它相关文章!
网站建设是一个广义的术语,涵盖了许多不同的技能和学科中所使用的生产和维护的网站。
关键词:手把手教学经典圣杯3列布局