php中的扩展Xhprof如何区分项目的性能
时间:2024/4/16作者:未知来源:争怎路由网人气:
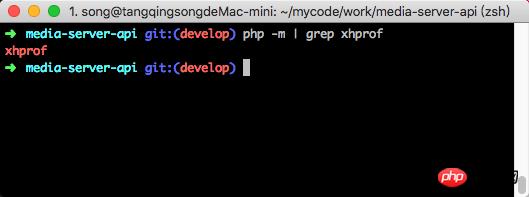
- grep xhprof
命令执行后,安装扩展成功的返回结果将会显示xhprof,如下图所示

五、测试
经过上面的操作笔者已经成功的安装与配置,现在需要用PHP代码来进行验证xhprof的分析效果
5.1 创建虚拟主机
首先创建一个虚拟主机,让用户可以通过浏览器访问所访问,创建虚拟主机需要有一个根目录,并编辑nginx配置文件,具体操作如下:
5.1.1 创建项目目录
创建项目根目录,参考命令如下
mkdir -p /Users/song/mycode/work/test
创建成功之后,笔者需要将之前git拉下来的部分代码复制到项目根目录当中,参考命令如下
cp -r xhprof/xhprof_html /Users/song/mycode/work/test/ cp -r xhprof/xhprof_lib /Users/song/mycode/work/test/
5.1.2 编辑配置文件
添加配置文件,参考命令
/usr/local/etc/nginx/nginx.conf
添加配置文件如下
server { listen 80; server_name test.localhost; root /Users/song/mycode/work/test; index index.html index.htm index.php; location / { try_files $uri $uri/ /index.php?$query_string; } location ~ \.php$ { fastcgi_pass 127.0.0.1:9000; fastcgi_index index.php; fastcgi_param SCRIPT_FILENAME $document_root$fastcgi_script_name; include fastcgi_params; } }在
/etc/hosts文件中增加入一行解析记录,记录内容如下:127.0.0.1 test.localhost
5.2 新建测试代码
在git仓库的
examples文件夹下,已经有了一份demo代码,不过这份代码的注释都是英文,而且排版方式也不易笔者自己理解,因此笔者重新编辑了此文件,参考步骤如下命令使用vim新建一个PHP文件
vim /Users/song/mycode/work/test/test.php
在文件中加入以下代码
<?php //加载所需文件 include_once "./xhprof_lib/utils/xhprof_lib.php"; include_once "./xhprof_lib/utils/xhprof_runs.php"; //随意定义一个函数 function test($max) { for ($idx = 0; $idx < $max; $idx++) { echo ''; } } //定义测试方法 function a() { test(rand(1000,5000)); } //开始分析 xhprof_enable(); //需要分析的函数 a(); //结束分析 $xhprof_data = xhprof_disable(); //实例化xhprof类 $xhprof_runs = new XHProfRuns_Default(); //获取当前当前页面分析结果 $run_id = $xhprof_runs->save_run($xhprof_data, "xhprof_foo"); echo "\nhttp://test.localhost/xhprof/xhprof_html/index.php?run=$run_id&source=xhprof_foo\n";保存代码之后,通过浏览器访问对应的URL地址,URL地址如下所示
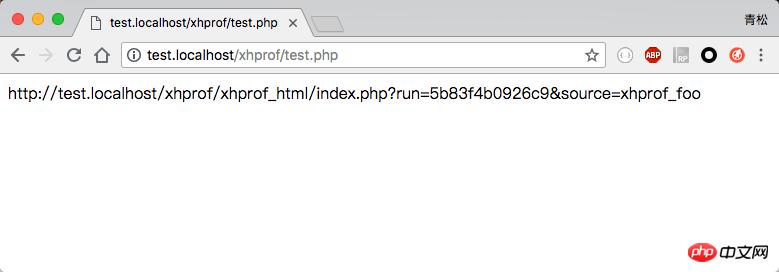
http://test.localhost/xhprof/test.php
5.3 结果分析
运行后结果,如下图

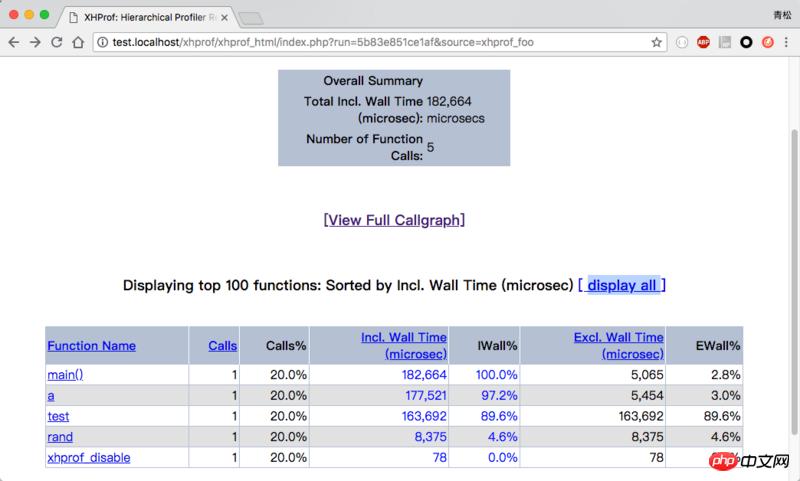
在页面中可以看到一个URL地址,复制并打开此URL地址之后,便能看到此代码的分析结果,如下图所示

在页面中有一个列表,展示了每一个方法所消耗的时间,如果觉得列表的方式表示不够清晰,点击页面中的
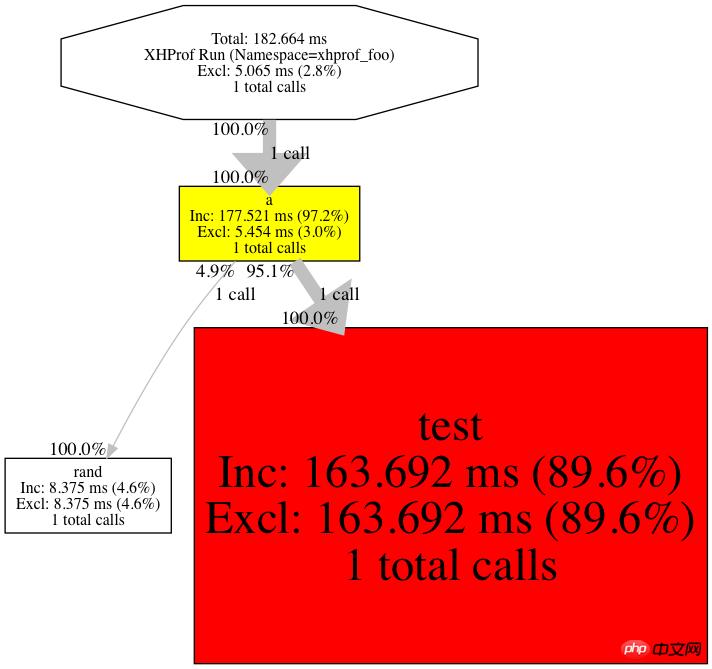
View Full Callgraph链接可以直接生成一个图片,如下图所示
在图中很清晰的可以看到执行时间都消耗在test方法上,因此笔者可以针对这个方法进行针对性的优化。
相关推荐:
以上就是php中的扩展Xhprof如何分析项目的性能的详细内容,更多请关注php中文网其它相关文章!
网站建设是一个广义的术语,涵盖了许多不同的技能和学科中所使用的生产和维护的网站。
关键词:php中的扩展Xhprof如何区分项目的性能