通过telnet访问路由器(通过telnet访问路由器实验)
时间:2024/11/27作者:未知来源:争怎路由网人气:
本实验通过PNET Lab 4.2.9为基础环境,使用vios-adventerprisek9-m.SPA.159-3.M3镜像演示。
思科15.x 版本之后需要加上transport input telnet 这条命令才能事先telnet访问。
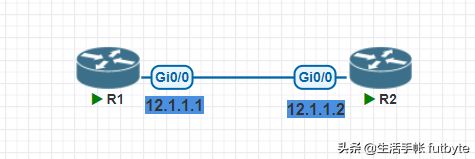
网络结构
第一部分 配置
1、通过PNET Lab在实验室中网络环境搭建
前面已经写过相关操作步骤,在此不在赘述。
2、telnet访问客户端路由器设置

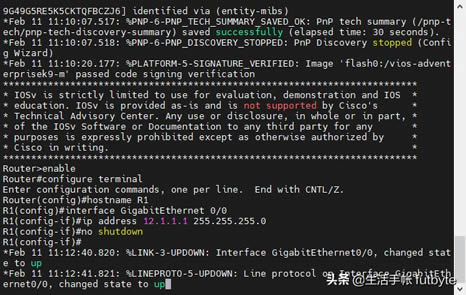
Router>enable // 进入特权模式
------------------------------------------------------------------------------------------------
Router#configure terminal // 进入全局模式
Router(config)#hostname R1 // 更改路由器名字
------------------------------------------------------------------------------------------------
R1(config)#interface GigabitEthernet 0/0 // 进入串行接口G0/0配置模式
R1(config-if)#ip address 12.1.1.1 255.255.255.0 //配置串行接口G0/0 ip地址
R1(config-if)#no shutdown //启用端口
3、telnet服务器端路由器设置

Router>enable //进入特权模式
------------------------------------------------------------------------------------------------
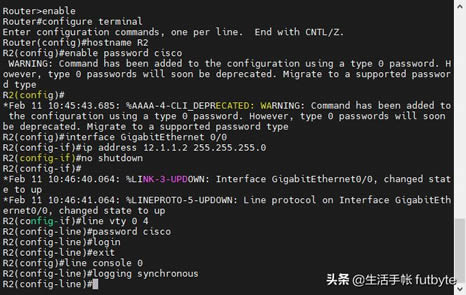
Router#configure terminal //进入全局模式
Router(config)#hostname R2 //更改路由器名字
R2(config)#enable password cisco //配置特权模式密码
------------------------------------------------------------------------------------------------
R2(config)#interface GigabitEthernet 0/0 //进入串行接口G0/0配置模式
R2(config-if)#ip address 12.1.1.2 255.255.255.0 //配置串行接口G0/0 ip地址
R2(config-if)#no shutdown //启用端口
------------------------------------------------------------------------------------------------
R2(config-if)#line vty 0 4 //配置vty线路
R2(config-if)#transport input telnet//允许远程连接的协议
R2(config-line)#password cisco //配置远程登录密码
R2(config-line)#login //允许登录
R2(config-line)#exit //退回到上一级
------------------------------------------------------------------------------------------------
R2(config)#line console 0 //配置console端口模式
R2(config-line)#logging synchronous //配置日志同步
第二部分 测试
1、查看本地接口状态

R1#show interface stats
2、测试网络是否正常
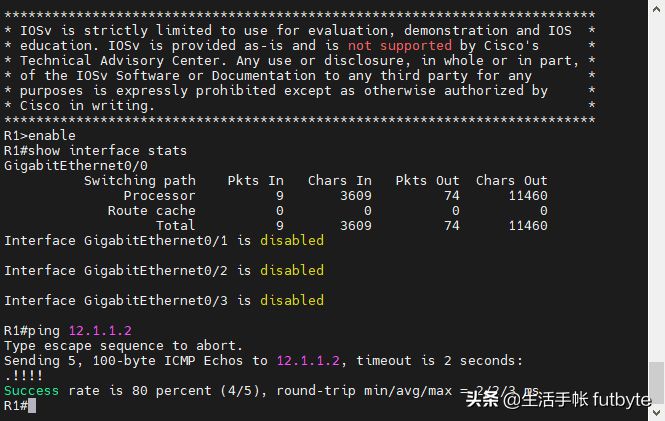
R1#ping 12.1.1.2
3、通过telnet远程连接路由器
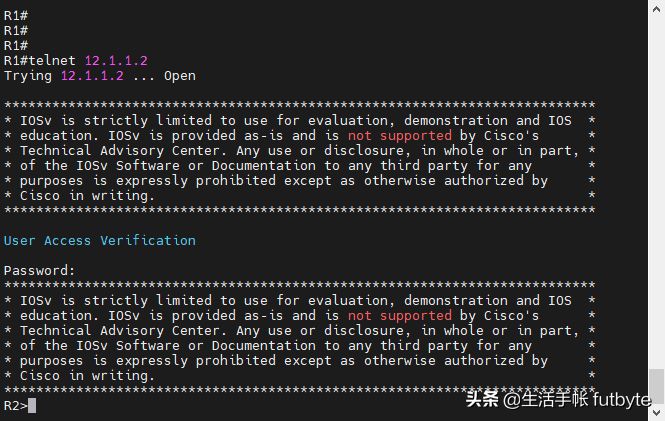
R1#telnet 12.1.1.2
关键词:通过telnet访问路由器(通过telnet访问路由器实验)