CCNA学习作业-单臂路由处理多VLAN互访问题
时间:2024/8/18作者:未知来源:争怎路由网人气:
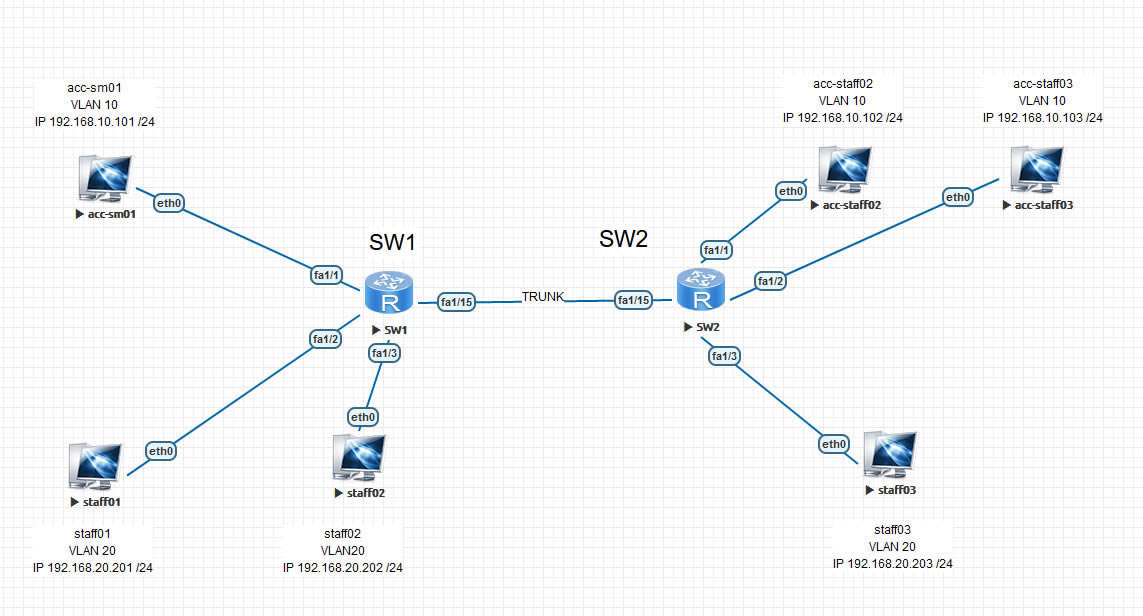
做一个简单的单臂路由多vlan互访网络模型
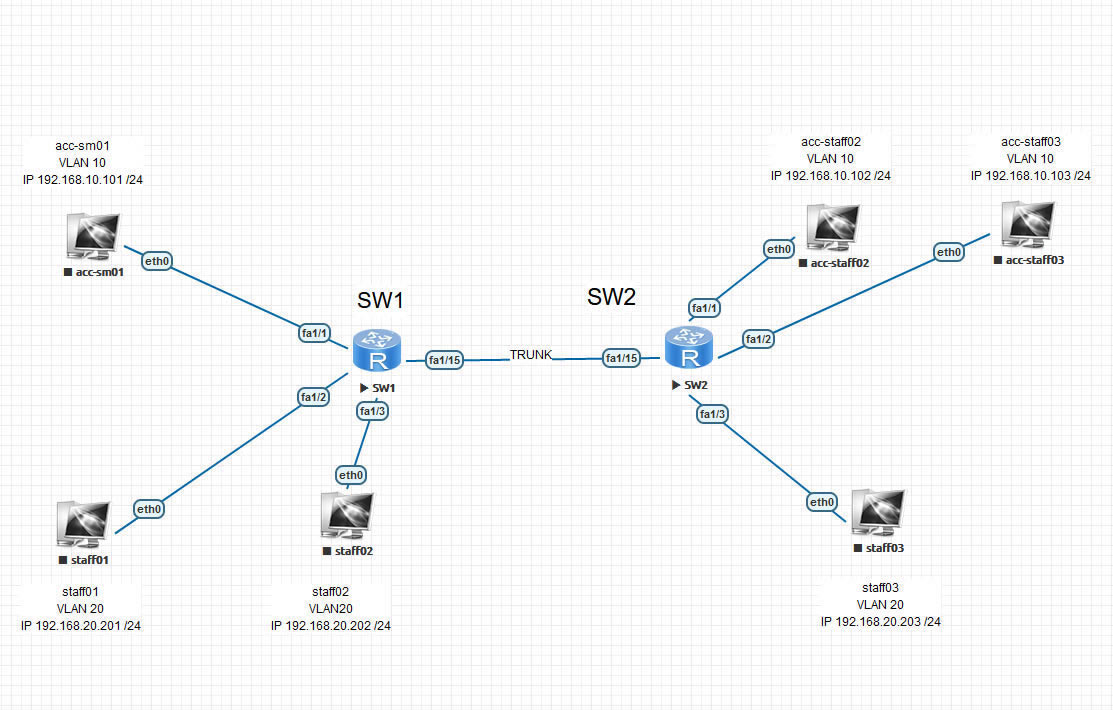
topology
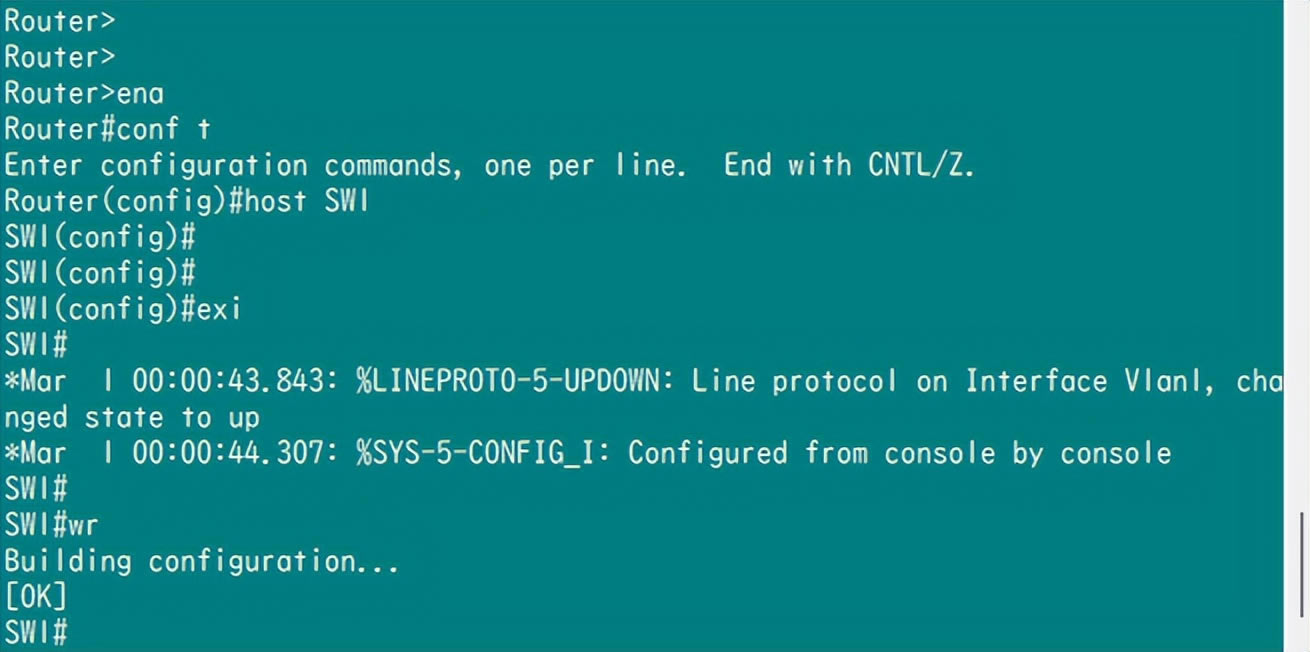
sw1 hostname
SW配置vlan的方法:
1-vlan database #进入vlan配置
2-vlan 10 #创建vlan 10
3-vlan 20 #穿甲vlan 20
4-interface f1/1 #进入f 1/1接口
5-switchport mode access #把端口变成access模式
6-switchport access vlan 10 #把该端口划给 vlan 10
7-exit #保存退出
8-show vlan-s #查看所有vlan状态
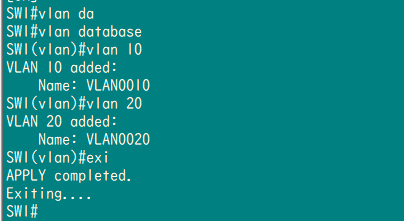
vlan da/vlan 10
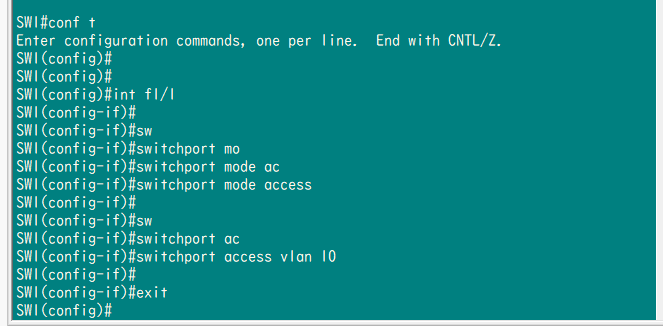
int /sw mo ac/sw ac vlan
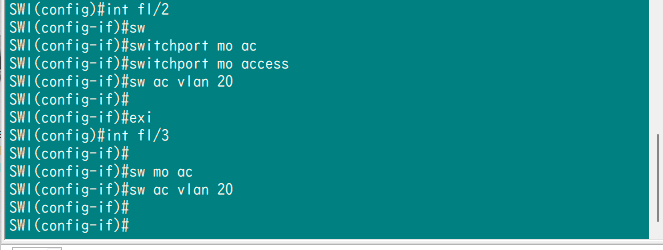
sw mo ac/sw ac vlan
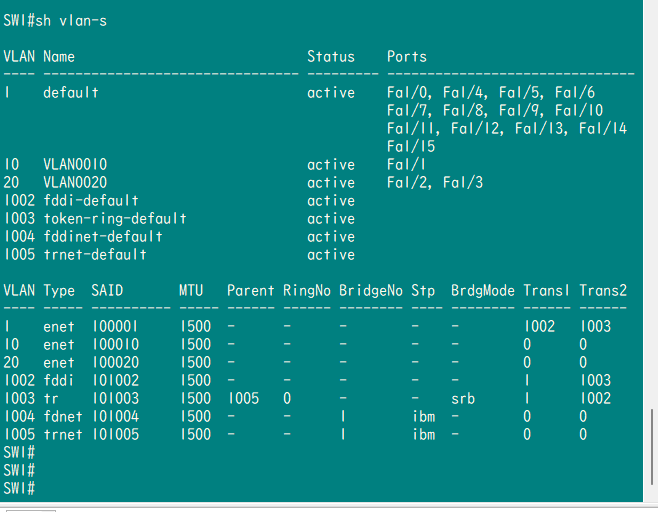
sh vlan-s
SW配置TRUNK的方法:
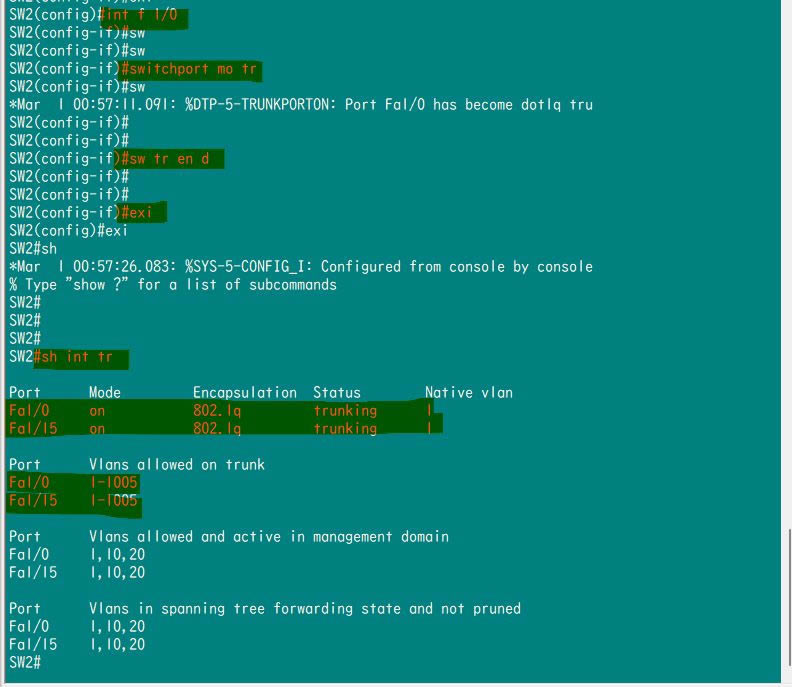
1-interface f 1/15 #进入15口端口
2-switchport mode trunk #把该端口模式调整为Trunk模式
3-switchport trunk encapsulation dot1q #封装形式设置为dot1q
4-exit #退出保存
5-show interface trunk #查询trunk的状态
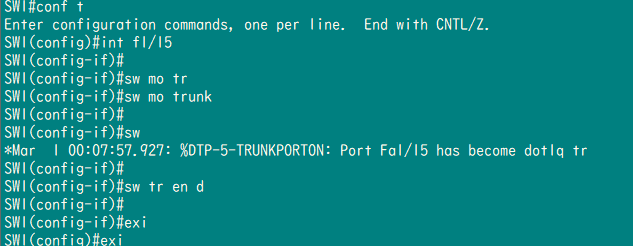
int /sw mo tr /sw tr en d

sh int tr
设置VPCS虚拟PC的方法:
1-set pcname sm01 #设置PC名称为sm01
2-ip 192.168.10.101/24 #设置PC的IP为192.168.10.101 255.255.255.0
3-save #保存设置
4-show #查看虚拟机状态
5-ping #执行ping命令
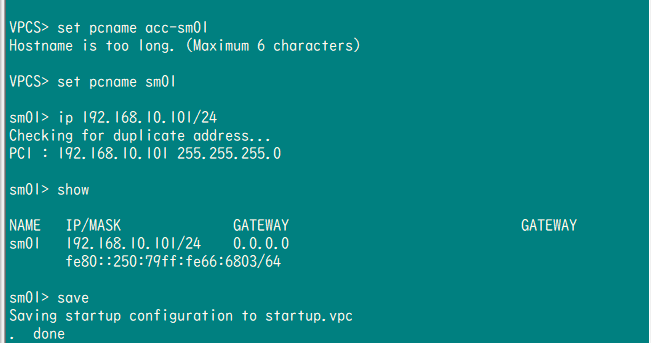
set pcname

ip [ip mask]
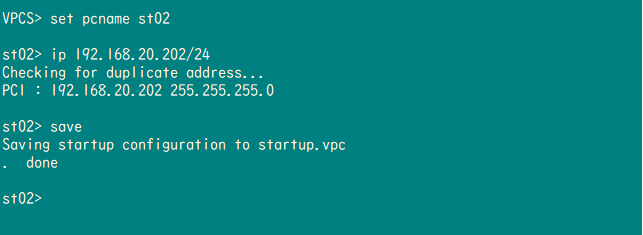
save
ip
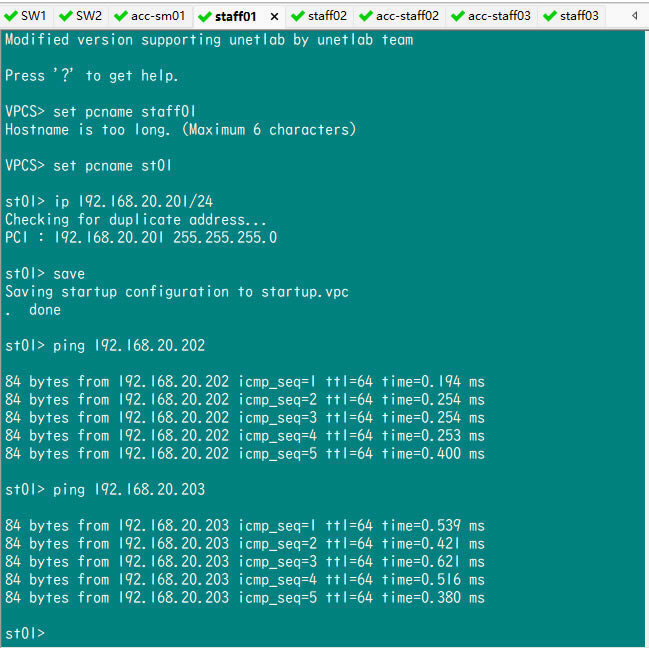
ping
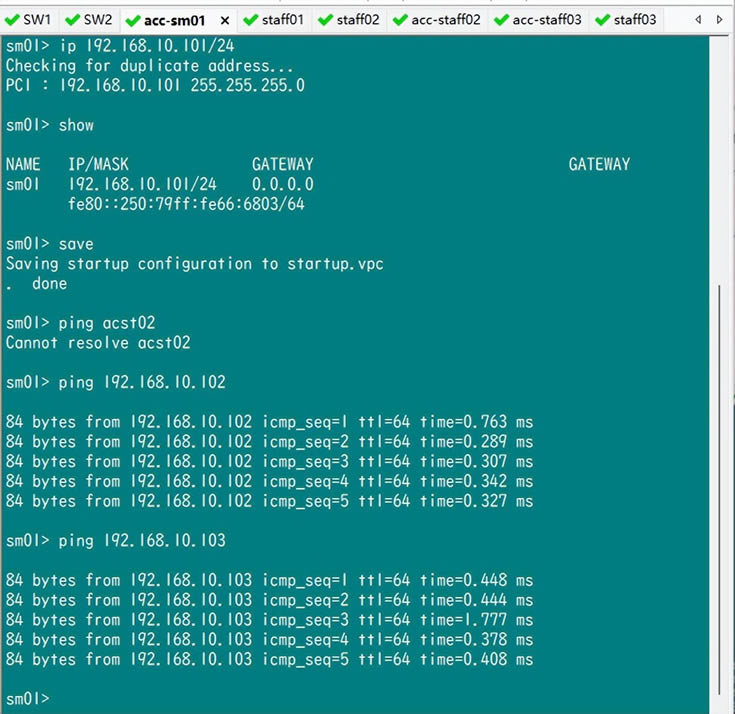
ping
单臂路由
如何配置单臂路由:
1-interface f 1/0 #进入SW f 1/0 端口 开trunk
2-switchport mode trunk #将端口变成trunk
3-switchport trunk encapsulation dot1q #将trunk数据封装形式设置为dot1q
4-exit #保存退出
5-show interface trunk #查看trunk配置,确认开启
6-hostname GW #设置GW名
7-interface f0/0 ------> no shutdown ------> exit#开启GW的f 0/0口,保存退出
8-interface F 0/0.10 #配置vlan10,先进入F 0/0的10子端口(虚拟)
no shutdown #开启子端口
encapsulation dot1q 10 #封装选择dot1q,vlan10的通道
ip add 192.168.10.254 255.255.255.0 #给子端口配ip(vlan 10的网关)
exit #保存退出
9-show ip interface brief #查看子端口的状态
10-int f 0/0.20 --> no shut ---> en dot 20 --->ip add --->exit #配置vlan20的子端口ip,封装,vlan号
sw2/int/sw mo tr/sw tr en d/sh int tr

hostname GW

int/no shut
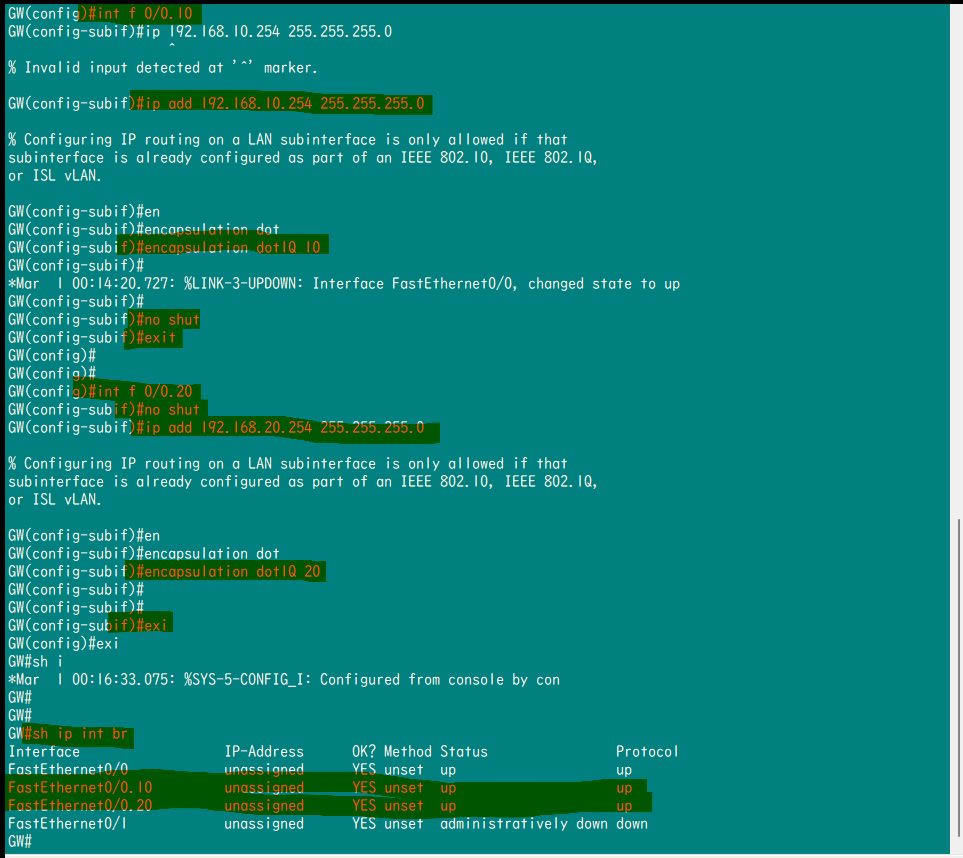
int f 0/0.10 / ip add /no shut /en dot 10

要先en dot vlan# 再 ip add
别忘了PC端要配置网关,没有网关就找不到出口,总结一下,
二层交换机主要配置:创建vlan、划分vlan、配置干道模式
路由器:创建子接口、封装、配置IP地址就可以了
PS:
大家可以先用txt文档写好之后,再去发到secureCRT里直接复制粘贴执行就可以了
关键词:CCNA学习作业-单臂路由处理多VLAN互访问题